
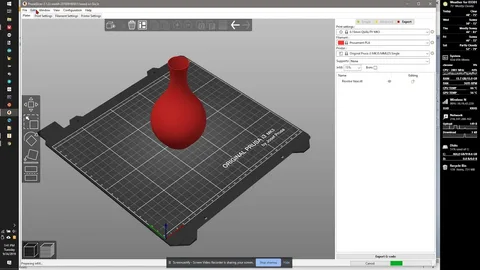
Customizing 3D prints has become easier and more powerful thanks to modern slicing software—especially Prusa Slicer, one of the most versatile and user-friendly slicers available today. Whether you’re a beginner learning how to enhance your designs or an advanced maker wanting to fine-tune every print parameter, mastering customization tools in Prusa Slicer can dramatically elevate your printing results. With the right techniques, you can control everything from surface patterns to support placement, filament changes, infill styles, and even print-on-pause modifications. These tools empower you to turn basic models into refined, professional-quality prints that stand out.
In this comprehensive guide, you’ll learn exactly how to customize your 3D prints using the most powerful features inside Prusa Slicer. We’ll explore advanced tools, hidden settings, and pro-level techniques that help you make your prints stronger, smoother, and more visually impressive. Whether you’re working on functional prototypes, artistic models, or complex mechanical parts, Prusa Slicer provides the flexibility you need. Let’s dive into how you can leverage these features like a pro.
Mastering the Interface and Custom Settings in Prusa Slicer
Understanding how to navigate the interface is the first step to becoming a power user of Prusa Slicer. The slicer is designed with a layered layout that includes Simple, Advanced, and Expert modes, giving you full control depending on your experience level. Simple mode is perfect for beginners, but as you grow more comfortable, switching to Advanced or Expert mode unlocks deeper customization options. These include editing filament profiles, manipulating printer settings, and adjusting parameters such as cooling, extrusion width, and layer transitions. Knowing where these features are and how they interact is essential to customizing prints efficiently.
Another key advantage of Prusa Slicer is its intuitive workflow. Because you can drag-and-drop models, apply custom supports, slice directly with keyboard shortcuts, and visualize layers in real time, you can make fast decisions about what settings to tweak. When working in Custom Mode, you can even apply different modifiers to specific regions of your model. This means you can change layer height, infill density, or perimeters only in the areas that need improvement. The result is a print that is both optimized and resource-efficient, giving you better quality without increasing print time unnecessarily.
Using Modifier Meshes for Advanced Print Customization
One of the most powerful features in https://prusaslicerdownload.com/ is the Modifier Mesh tool, which allows you to apply print settings to specific parts of a model. Modifier Meshes can be added as simple shapes like cubes, cylinders, or spheres, or you can use a second STL file as a modifier. This enables precision customization—such as increasing infill density around stress-points, making a particular section thicker, or reducing the layer height only in zones requiring higher detail. It’s an advanced technique that gives you unmatched control over mechanical and aesthetic outcomes.
Most slicers limit you to global slicer settings, but Prusa Slicer stands out by letting you stack multiple modifiers on top of each other. For example, you might add a Modifier Mesh to boost strength in the base of a functional part, while adding a second modifier around decorative areas to improve detail. You can also assign different materials to multi-extruder printers using modifiers. These tools turn a standard 3D model into a fully optimized production-ready file. With practice, you’ll find Modifier Meshes essential for refining professional-level prints.
Enhancing Detail with Variable Layer Height
Variable Layer Height is one of the most celebrated features in Prusa Slicer, enabling you to blend smooth curves and high-detail areas without increasing print time dramatically. Instead of slicing your entire model at a single resolution, the variable layer height tool allows you to apply fine layers (such as 0.1 mm) only where needed—typically in rounded or visually sensitive areas—and thicker layers (such as 0.28 mm or 0.3 mm) everywhere else. This results in faster prints that still look smooth and refined.
What makes Prusa Slicer unique is its smart, intuitive variable-layer controls that allow you to adjust the layer transitions manually or automatically. You can apply smoothing curves directly in the interface, raising or lowering specific sections of the layer graph. This gives you extremely fine control over the surface quality of your prints. Models like statues, helmets, toys, and cosplay pieces benefit significantly from the technique. It’s a simple but powerful way to improve your print finish without significantly increasing print duration. Once you master the tool, it becomes one of your go-to methods for custom finishing.
Custom Supports and Paint-On Tools for Cleaner Prints
Support material is essential for many prints, but default support generation can lead to wasted filament or damaged surfaces. Fortunately, Prusa Slicer includes advanced custom support tools, including the highly praised Paint-On Supports feature. With this tool, you simply “paint” directly onto the model where you want supports to generate. This gives you full control over placement, allowing you to avoid unnecessary supports while reinforcing only the critical overhangs that need stability. The result is cleaner removal, faster post-processing, and fewer surface imperfections.
The Paint-On tool isn’t limited to supports—you can also paint custom modifiers, seam positions, thickness adjustments, and more. This level of brush-based customization is ideal for creators who want to refine their models with precision. If a model has tricky overhangs or fragile structures, painted custom supports provide a more elegant solution than relying on automatic settings. Combined with organic supports and variable density options, Prusa Slicer’s support customizations make it easy to achieve professional print quality with minimal cleanup. This capability alone sets Prusa Slicer apart from many other slicers on the market.
Optimizing Multi-Material and Color Printing Like a Professional
For users with MMU (Multi-Material Unit) or multi-extruder setups, Prusa Slicer offers some of the most advanced color and material customization tools available. The Color Painting feature allows you to assign filament colors or materials directly onto your 3D model. Whether you’re printing signage, logos, multicolored figurines, or functional parts requiring flexible and rigid materials, this tool makes the process simple and intuitive. You can paint with different brushes, adjust flow zones, or apply gradients for creative designs. Prusa Slicer also shows a preview of filament swaps so you can estimate purge waste before printing.
For those who don’t own an MMU, Prusa Slicer still offers a creative option through manual filament changes. With the “ColorPrint” feature, you can insert pauses at specific layers, enabling you to switch filaments manually. This allows you to create beautiful multi-color prints or embed objects—like nuts, magnets, or electronics—directly into your model. These advanced customization tools turn standard prints into highly functional or visually unique pieces. With the growing popularity of multi-material 3D printing, mastering these features in Prusa Slicer ensures your projects always look professional.
Final Thoughts
Customizing your 3D prints is easier than ever when you use the powerful tools inside Prusa Slicer. From modifier meshes to variable layer heights, custom supports, and multi-material control, the slicer gives you everything you need to tailor your prints with precision. Once you understand how to use these features strategically, you’ll be able to transform any basic model into a fully optimized, professional-grade build. Master these techniques and you’ll be customizing your 3D prints like a true expert—no matter your skill level.
